Birds of a Feather...dress a whole lot a like.
I cannot begin to tell you how much my girls make me laugh. And it's a good thing, because it certainly helps them out big time when they're supposed to be in trouble. Anyway, this day below, was their 2nd visit to the dentist's office. Thankfully, their first visit was incredibly fun and they don't have irrational fears of dentists like my husband someone I won't mention. Now, a quick background point for all my readers: My husband is a musician and as we all know, musicians usually beat to a different drum. Often times their sense of fashion goes hand in hand with their creative musical flair. So, I must submit, that my two daughters incredible sense of fashion comes from their Daddy. ; )
Isn't this how EVERYONE dresses up to go to the dentist? Do notice that my youngest carries a penguin in her purse instead of the requisite yippy dog. THAT, she got from me and it makes me proud. So looking at how my two birds of a feather flock together...I now know that I have years of interesting outfits and fun times to look forward too.
Now on to the deets. I picked up the Cosmo Cricket Togetherness Deluxe Kit, for this one. It is a very whimsical line with birds, butterflies, clouds and kites. I used all paper for this layout and will use the embellies, Glimmer Mist and Flocking Powder for my next project....coming up soon.

I used a template to create the bracket die cut, which I cut in half put part on each side. The paper line comes with a page of borders, which worked well with my Birds of a Feather theme. I cut out some of the birds from the paper, faux stitched around the edge and popped them up for dimension.

Now go put on an outfit and accessorize it like no one is watching!! And don't forget your penguin in a purse!
Kaiser Kraft ~So Kool!


The Holiday Season is now upon us!
If you're not shopping for Halloween costumes, then you're either starting on your Christmas card making or buying presents. The Holiday Season is officially upon us crafters anyway. So let me inspire you with this new Christmas line from KaiserCraft. Yes indeed, it's the very company that makes all the wonderful wooden MDF projects you love so much. As soon as I saw this in the Sneak Peeks from CHA, I was hoping and hoping that this would make it into the Shoppe. My delight was complete when I saw the Deluxe Kit that Tammy put together with this beautiful Vintage paper line.
Here is a layout of my two "dress up" Queens. This day, they were Santa's Helpers of course. We did this photo shoot during the great blizzard of 2010 trying to shoo away the cabin fever. It's a bit hard letting your 3 1/2 foot children play in 5 feet of snow!

My first step, since I wanted to pick up the red of the dress in the photograph was to cut the tan background off the sheet with the scrolling die cut. I cut around the edges and used a dark red background to replace the old one. The edges of the red cardstock are inked with the Mudslide Colorbok pad included in the kit.
TIP: Since the Colorbok pad is ink instead of Chalk ink, you can dab a makeup sponge onto the ink pad and use the sponge to ink your edges for more of a brushed and softer look. Using the ink pad directly on the edges of your paper can give harsh, dark lines that do not give an aged look to your project.
Next, I created a Christmas tree of sorts by cutting out wavy triangles out of the green damask paper and distressing the edges with the Mudslide ink using the tip above. I wanted the scrolling die cut to work as a frame, so I used my Swivel Exacto knife to cut out an edge on the inner part of the die cut...this is known as fussy cutting. I set my Christmas tree inside the cut and removed any green edges sticking out the other side.

The mat for the bigger photo was created using the Martha Stewart Deco Fan around the page punches. I only did two sides since I was tucking the photo behind the tree and another cut edge of the die cut at the bottom. The snowflakes are made with the St Nick/Newspaper sheet and Joys of the Season Cricut cartridge.
To give the snowflakes a more vintage and finished look, I inked the edges with the Mudslide ink. I used both sides of the St Nick paper to create the snowflakes. The fatter ones above were made with the Newsprint side and the skinnier ones were made with the St Nick side. I used Mudslide over the skinny snowflakes to darken them up a bit to contrast with the fatter snowflakes and yet still keep the design visible underneath. My next step for all the snowflakes was to coat them with Rock Candy Crackle Paint. While the paint was still wet, I grabbed some translucent sparkly embossing powder between my thumb and index finger, and gently rubbed my fingers together over the snowflakes as it lightly dusted them with the powder. Using your fingers to rub the powder over top of your snowflakes will keep it light and even. I used my heat gun lightly over the snowflakes to just melt the embossing powder so it wouldn't leave a milky sheen on the snowflakes and Crackle Paint, then I let the rest air dry to create the crackling effect.

So, now go panic...because you only have 95 days until Christmas. Hah!! Happy Scrapping!
Texture, Texture Everywhere!



Mitten Weather??? Some wish it...so let it be so...
Who here has had 100+ degree temperatures consistently this past month? Anyone else digging all the Holiday action we have going on here? If you can't stand the heat, I say get inside and scrap something cool and delightful. If Halloween's your thing, Patti has been creating some way cute items with Graphic 45's Alice in Wonderland Kit. If you're a Christmas crafter instead, I have the new Cosmo Cricket Mitten Weather for you. We have two options for you in the store. We have the Mitten Weather paper line or if you like matching embellies without the headache of picking them out, try the Mitten Weather Deluxe Kit.
Here is project numero uno with the kit. Aren't you digging the splash of purple? It's such a nice addition to the standard red and green of Christmas. It makes for a nice fluctuation between Christmas layouts or Wintry layouts. Here is picked a little of both and grabbed these pictures of my youngest in her Christmas outfit from last year. These turned out to be my favorite pictures of the whole season because I think she looks like a porcelain Winter Angel.

I used the Martha Stewart Layered Arches for the red edging to give the color splash. I picked up one of my border stamps and stamped around the border to give my layout a frame and then added some Ruby Red Liquid Pearls in between the arches for color. Now how often do you get to use Tinsel Garland on your layouts?

We can't wait to see what Holiday creations you are making. Post a link in our comments section so we can be sure to check it out.
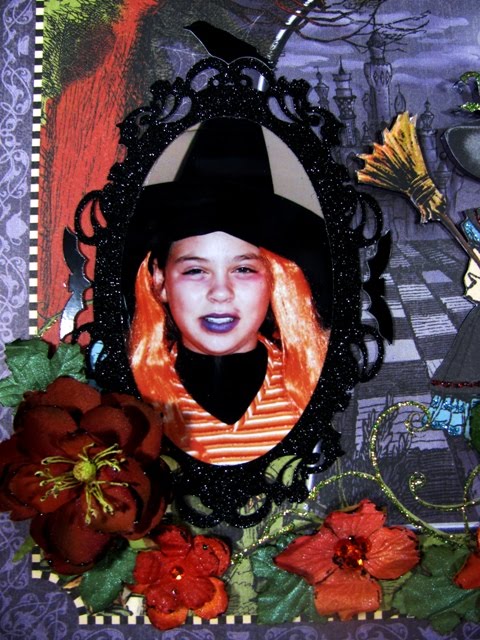
Halloween in Wonderland ~ Spellbinding


 Posts
Posts


